The Tea Primer: Side Quest (Tisanes and Herbal “Teas”)

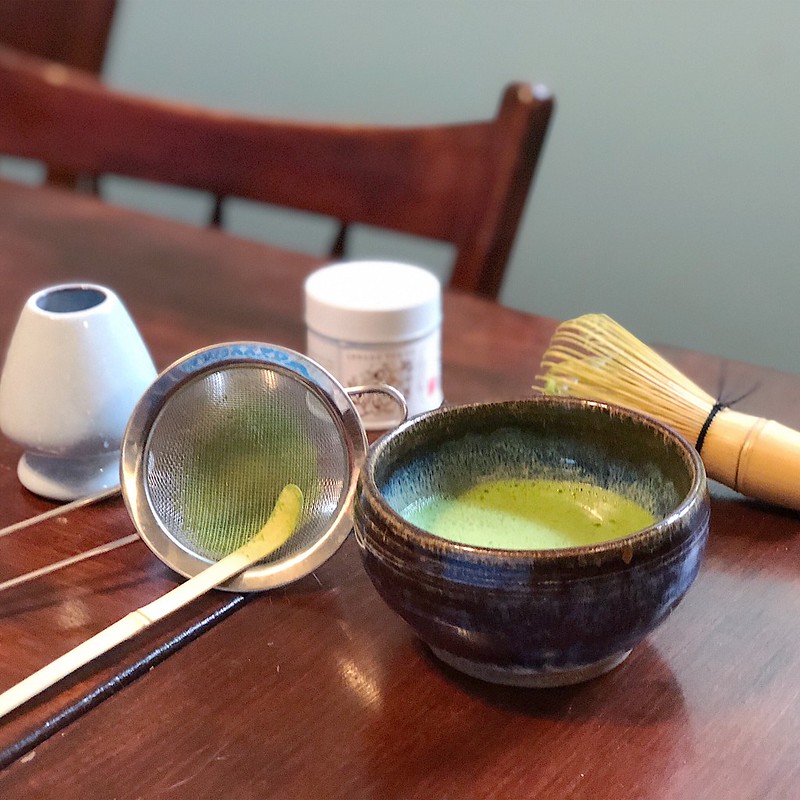
As I mentioned in the prologue, the primary focus of this tea primer is true tea, made from Camellia sinensis. As such, I am loathe to consider herbal infusions or tisanes as “teas” (heck, even Benedict Cumberbatch has waded into this fray). But I do frequently enjoy infusions and tisanes of herbs and spices, and I thought I’d talk a little bit about my philosophy on herbal teas, where I get my herbs, how I prepare them, and share some of my favorite blends.

First of all, in herbals as well as teas, I prefer loose-leaf. I will use teabags in a pinch, but I find the flavor from loose-leaf herbs to be far superior. Plus, I love to create my own blends. One problem I have with commercial herbal blends is that they often contain ingredients to make them taste sweeter, or to cover the flavor of less palatable herbs. In layman’s terms, this usually means stevia, licorice root, or cinnamon, all of which I don’t particularly like. Cinnamon I can tolerate in specific blends, but only if it’s there for a reason, and not just to elevate the flavor of a blend with a particularly unpopular taste. So obviously the blends and opinions I share here will be heavily influenced by my own tastes. But the nice thing about blending your own herbal teas is that you can follow your tastes and see what works for you.

A Note About the Health Effects of Herbal Teas:

Personally, I came to herbal tea from my investigation into amateur herbalism. I’ve taken some training over the years, and done some self-study of herbal medicine, and have a decent understanding of a limited field of common herbal remedies, which I use for myself and my family members for minor complaints. Do note that I’m not a medical professional or even a licensed herbalist and I can’t give you advice on what to use for your own complaints, just a description of what works for me. I’m talking about really gentle things like ginger for an upset tummy or a cup of chamomile tea before bed.

But I think it is important to remember that herbs do have constituents that can affect our health, in both positive and negative ways. Personally, when I use herbs, I like to stick to traditional methods of ingestion: mostly infusions in water, with the occasional salve/oil/tincture/vinegar. I don’t generally take tablets or capsules of whole plants because most plants weren’t just eaten whole, unless they were food plants. Plus, I find a lot of benefit, personally, from the experience of a nice cup of tea than from popping a pill. But that’s just my preference.

All that said, most herbal teas, drunk for taste and pleasure, are probably not going to have enough plant matter in them to cause a strong reaction, unless you have a specific condition. I think it’s important to know what’s in your teas and what effects it can have, but for the most part, expecting a strong medicinal effect from the amount of plants used in a cup of herbal tisane drunk for enjoyment is unrealistic. Personally, I’ve started keeping more of an eye on this since becoming pregnant, as the body can be more sensitive to certain actions, and also I sometimes brew my loose-herb tisanes stronger than the typical cup made with a teabag.

I generally consult multiple sources to determine if there is any evidence that an herb might cause an adverse effect. Of course, almost all herbs are labeled with an obligatory “if you are pregnant or breastfeeding, consult your doctor” because there just aren’t a lot of studies of herbs on pregnant women. And similarly, there just aren’t a lot of studies of certain herbal remedies. So when I’m curious if a tea might have an adverse effect, I tend to check these three places: Mountain Rose Herbs (where I buy a lot of my herbs), Botanical.com, and WebMD.

These three resources give different layers of information. WebMD gives me information any known interactions with medication or specific medical conditions (such as the possible blood-thinning effects of chamomile). Mountain Rose Herbs usually gives a warning if there is a specific action that you should be aware of (such as using caution when taking chamomile if you are allergic to other members of the Asteraceae family, which includes ragweed). And Botanical.com gives a more complete picture of the chemical constituents of an herb, its historical usage, and how different parts are used. That said, these are not the resources I used to gain a working knowledge of using herbs for my health, but that is a topic for another time. If you’re interested in gaining more knowledge about herbal healing traditions, I’d highly recommend seeing if you have a local herb store that offers classes.

Finally, it’s important when choosing herbal tisanes and infusions to know exactly what plant you’re getting. True tea, as I’ve mentioned before, is from only one species of plant, Camellia sinensis, but herbs can have a multitude of names, and sometimes the same name can refer to different species of plants. Using the chamomile example above, “chamomile” can refer to Anthemis nobilis or Matricaria chamomilla. Fortunately, both of these have similar effects. But another example is cinnamon: what most of us have in our spice racks is actually cassia cinnamon (Cinnamomum cassia), which contains a chemical constituent called coumarin, which can have adverse effects in the body. Another kind of cinnamon, Cinnamomum verum, which is called Ceylon, sweet, or true cinnamon, doesn’t contain these coumarins. Both are sold simply as “cinnamon,” so it’s important to buy from a reputable seller who provides full Latin names if you have a condition that could interact with coumarins, to make sure you know what you’re getting (in fact, the form of cassia cinnamon sold at Mountain Rose Herbs is a third type of cinnamon, Cinnamomum burmannii, which can have even higher coumarin levels than C. cassia, but they clearly label the Latin name of the form they sell so you know what you’re getting).

So Where Do I Get Herbal Tea?

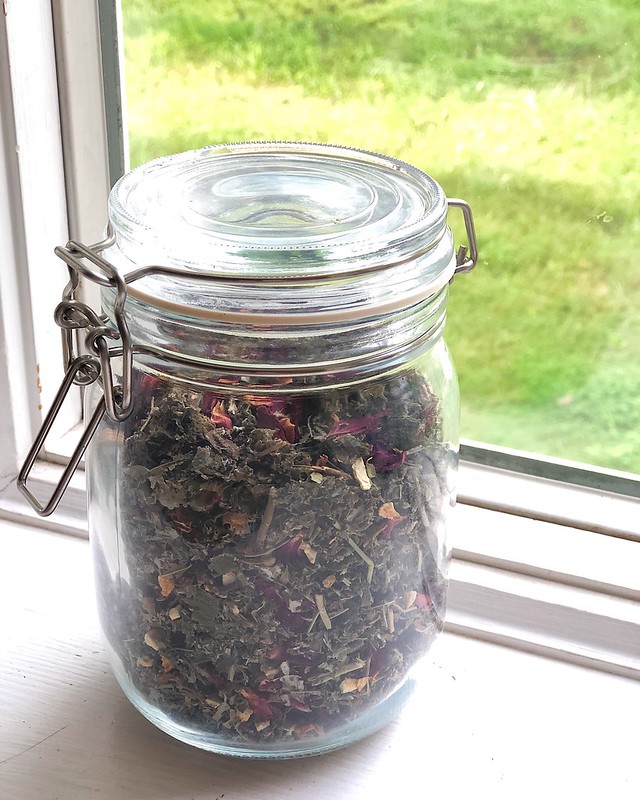
This all leads nicely into the discussion of where I source my herbs. As I mentioned, Mountain Rose Herbs is where I get a lot of my bulk herbs. If you’re very new, they sell herbs in a variety of sizes, so you can buy just an ounce or so of a bunch of different herbs. The shipping costs can be steep, but it generally balances out, and the quality is high. In particular, my absolute favorite dried peppermint comes from MRH. When you open the bag, your eyes water from the mintiness. And they ship things in thick, resealable, plastic zipper bags, so you can store your herbs in the bags they come in and be relative sure they will stay fresh. They offer a large variety of different herbs and spices and give the Latin name clearly, as well as a brief overview of uses and precautions right on the website. Plus, they have some extra things, like oils, butters, and accessories.

As I mentioned, the drawback of MRH is the shipping cost. Sometimes, if you’re only buying a little bit, the shipping cost will be as much or even more than the price of the herbs themselves. So when I’m buying small amounts of herbs to test out an herbal blend, I will often turn to Etsy sellers. In particular, for herbs, I’ve liked what I’ve gotten from Mortar and Petal, which is sadly currently closed for the holiday season. But when I was buying small amounts of herbs to test out a new blend for my pregnancy tea, I liked that I could buy just half an ounce or an ounce of a few different herbs and have them ship in a small padded envelope, rather than paying for the whole box-and-bubbles deal that comes from MRH. Plus, it’s less packing material.

But what about when I’m not in the mood to measure out loose herbs and muck about with an infuser? I’ve already admitted to using bagged tea for a real cuppa, and I will admit to drinking bagged tisanes as well. While I love my pyramid, whole-leaf bags for herbals as well as true tea, I also drink paper teabag tisanes. My favorite brands of tisanes that I can get in my store are Traditional Medicinals, Celebration Herbals, and Buddha Teas. All of these brands offer herbal “simples,” which means bags with just one kind of herb, which is nice, as well as blends. It’s important to read the ingredients lists and supplement facts for the blends to make sure you know what exactly is in the tea, though. I find that Traditional Medicinals, in particular, likes to add licorice and/or stevia to their blends to sweeten them, which I dislike. Also, other than Celebration Herbals, they’re not great about putting Latin names on the boxes sold in stores, so if you’re concerned about that, you’ll want to look them up on their websites.

But for an easy cup of tea, especially when I’m not feeling well, I like using bags. It’s also the easiest way to carry herbals around without getting sideways glances for keeping a bunch of unlabeled jars of dried leaves in your desk cabinet. And it’s basically the only way I get my husband to drink a cup of herbal tisane when he’s sick.

Finally, for spices and fresh herbs, I often just get my materials from my local grocery store. I’m fortunate to have a store nearby that sells a large variety of bulk whole spices, plus I generally try to keep a knob of ginger root on hand. And some herbs, I can grow in my wild little herb garden (mostly sage and peppermint, honestly).

Preparing Herbal Tisanes, Infusions, and Other Hot Drinks:

So first a note about terminology: Typically, a bit of plant that is put in some hot water and left to sit for a certain amount of time is called a “tea” or “tisane” or “infusion.” Some herbalists differentiate between “tisane” (or “tea”) and “infusion” by insisting that an “infusion” is a very strong steeping of an herb, meant to draw a medicinal quantity of the active constituents into the brew. I’m not quite so pedantic about, but I generally consider an infusion to be stronger than a tisane, and I also generally consider an infusion to be a cuppa brewed more for the medicinal benefit while a tisane is often just for the pleasure of it (although of course the lines blur).

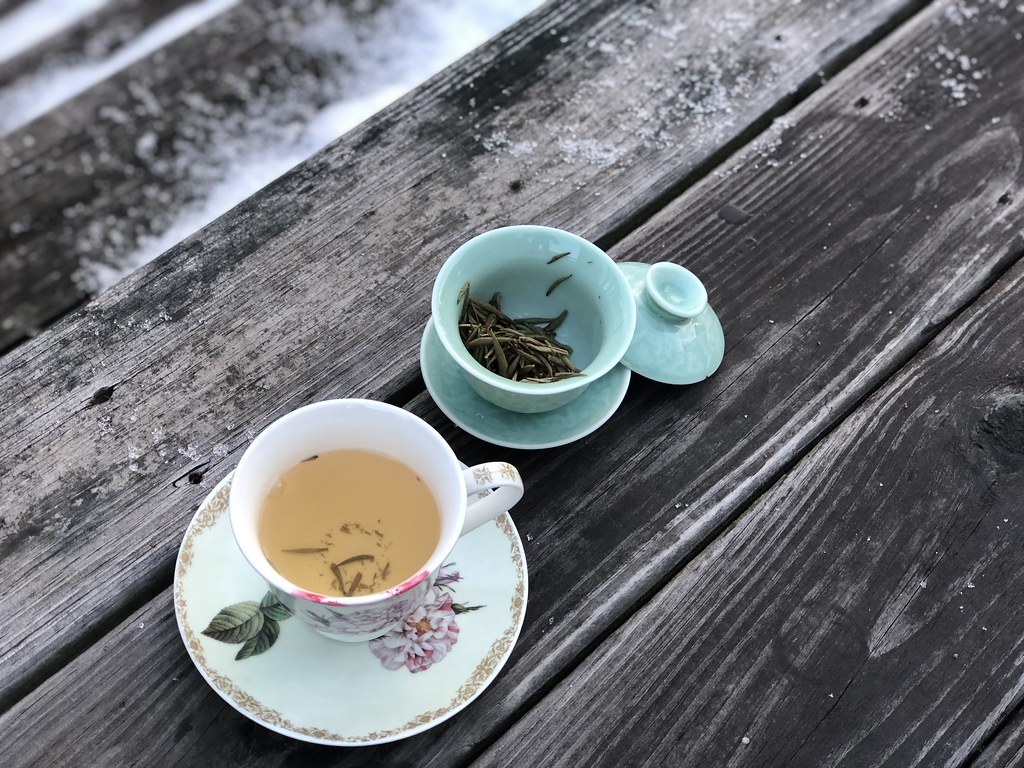
There are multiple ways to make a hot drink with non-tea plant matter. Personally, I like to steep most leaves and flowers similarly to how I would steep a tea — plunk a bit of it in hot water, let it sit for a while, and then pull the leaves out and enjoy. If I want something stronger, I’ll put a large amount of plant matter in a heat-safe jar, fill with boiling water, cover and steep for an hour or more before straining. But generally, I brew a cup of “herbal tea” by taking a tea bag or 1-3 teaspoons of loose herbs and steeping them in boiling water for 5-15 minutes, depending on the plant in question. It definitely helps to play with brewing parameters with herbs because different herbs have different flavors and strength of flavors.

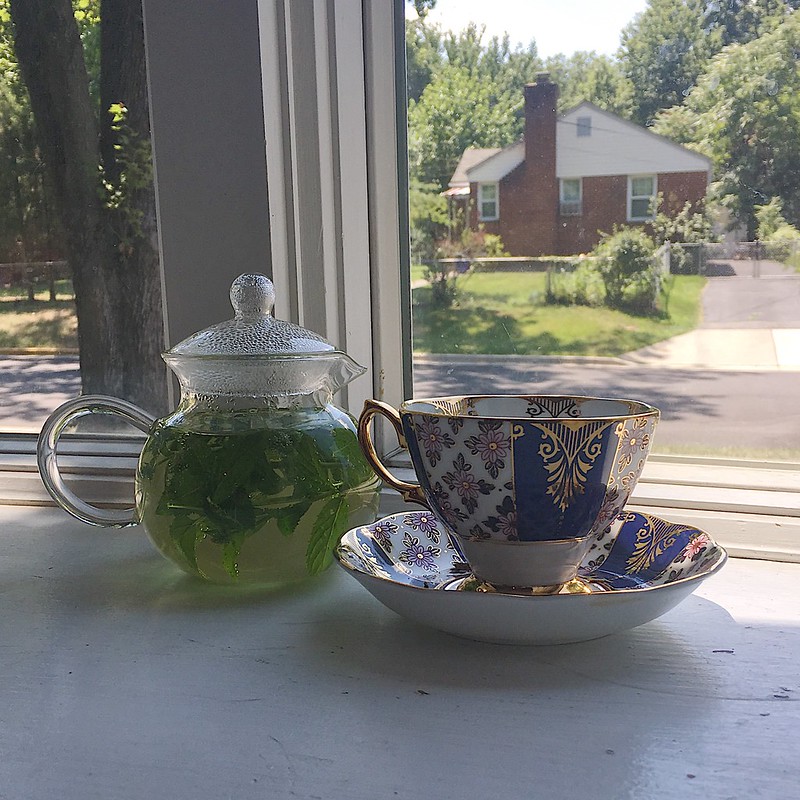
Now, this is for dried herbs. It is absolutely possible to make an enjoyable tisane from fresh herbs, but you have to remember two things: 1.) fresh herbs have more water content and will have less concentrated flavors, so you will need more plant matter for a brew, and 2.) fresh herbs will often have a different flavor than the dried version. For example, I love fresh thyme’s citrusy notes, but dried thyme isn’t something I enjoy. One of my favorite herbs to steep fresh is peppermint, which has a green freshness that you don’t get from the dried herb. I take a handful of fresh peppermint from my garden, wash it, and steep it in boiling water for five minutes or so, often leaving the leaves in the pot while I enjoy the tea.

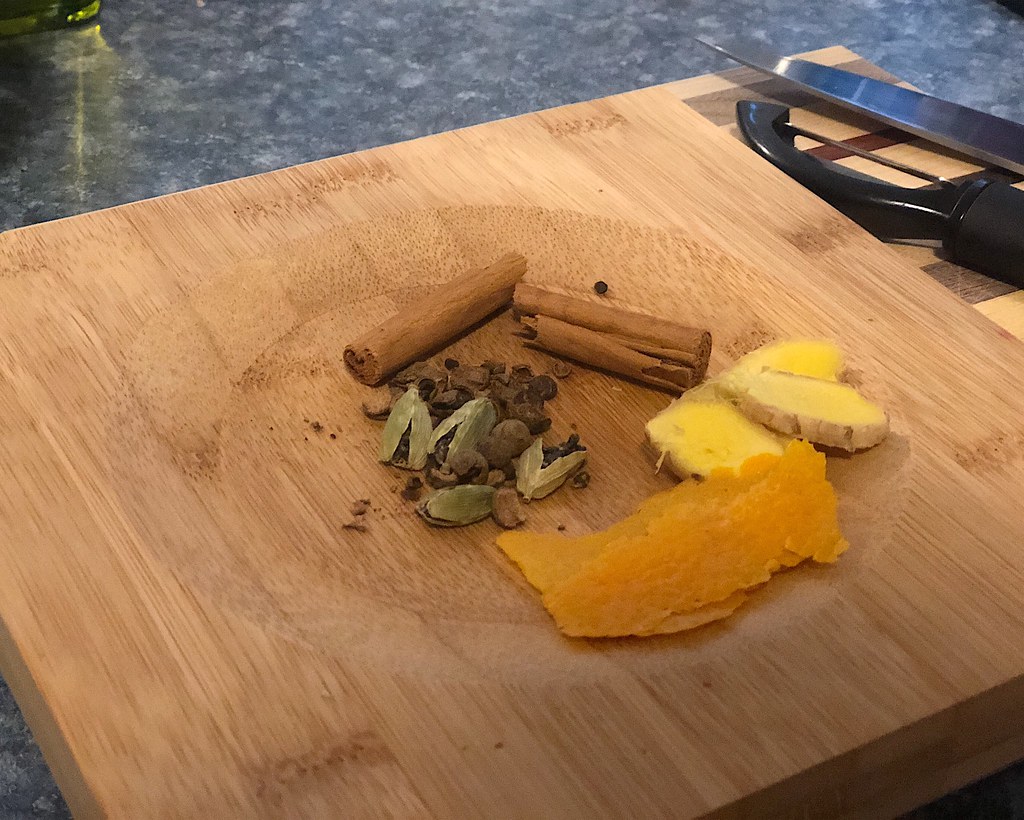
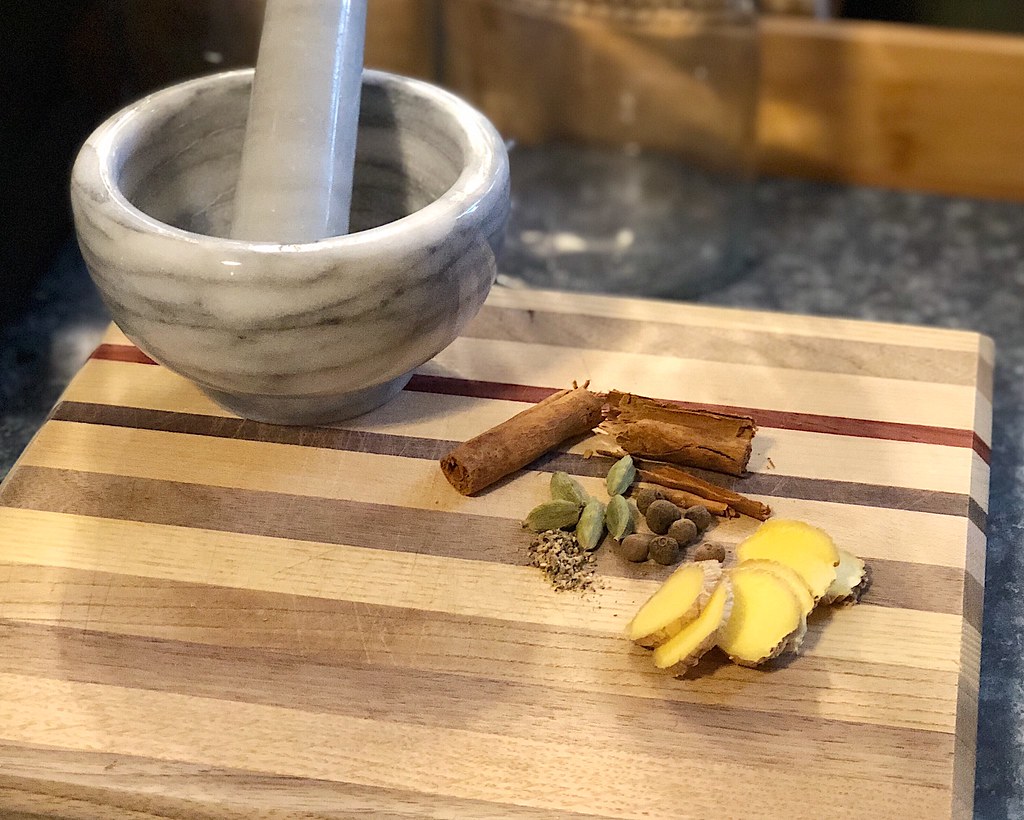
But you can also make a lovely hot beverage from spices and roots, which often requires different handling. I generally make spiced teas by cracking the spices slightly and simmering them in water for 15 or so minutes to fully extract the flavor (also called a decoction). An example would be the tea I describe in this post. Simply steeping spices in hot water often doesn’t yield a strong enough flavor, although one of my favorite spice teas is thin slices of ginger root steeped in boiling water for upwards of 5-10 minutes (I just put ginger in a mug, add boiling water, and drink it grandpa-style, refilling as the ginger punch becomes too intense).

Finally, you don’t have to steep your herbs and spices in water. My favorite nightcap is a mixture of lavender and chamomile, and it is particularly nice steeped in hot milk (or milk substitute) with a little dollop of honey. I don’t let the milk boil, but I bring it up to about 165 F and let it steep for a little bit before straining out the bits of herbs. Spices are also quite nice steeped in milk.

Some of My Favorite Combinations:

Spice tea: fresh orange peel, fresh ginger, Ceylon cinnamon, allspice, and cardamom (I developed this for my chai-loving, caffeine-averse mother-in-law!)

Pregnancy tea: red raspberry leaf, rose petals, lemon and orange peel, and lemon verbena (I’ve been drinking a cup of this every day since entering my third trimester)

Gardener’s Herbal Tea: Nettles, oatstraw, red raspberry leaf, and rose hips

Lavender and chamomile tisane: 1 scant tsp. of lavender buds and 1 heaped tsp. of chamomile flowers, steeped in a mug of boiling water for 10 minutes (my go-to before bed if I’m not making the milk-steeped concoction described earlier)

Fresh mint tea: a handful of fresh mint leaves steeped liberally in boiling water (brilliant for summer afternoons, especially with a lime wheel)

Fresh ginger tea: 5-7 thin slices of fresh ginger, steeped in boiling water grandpa-style, sipped until too strong and then topped off with more water (this one is lovely with a dollop of honey and a squeeze of lemon when your throat is a little scratchy, and I generally make it to keep backstage at shows)

Sage and honey tea: 1 tsp. of dried sage or 5-7 fresh sage leaves, steeped in boiling water for 5 minutes, and then sweetened with a generous dollop of honey (this is my personal remedy for a nighttime cough)

NB: I am not a medical professional nor am I a professional herbalist and cannot give health advice concerning the use of herbs. All the teas I describe here are my personal blends and favorites and I encourage you to do your own research and find your own favorites.

The Tea Primer: Bonus Levels (Matcha and Masala Chai)

Hello, again! While I ended the main tea primer with Level Three’s superficial introduction to gong fu brewing, I thought I’d return with two “bonus level” techniques. While I’m not a tea expert by any means, I have had first-hand teaching in two specific traditional preparations of tea: Japanese matcha and Indian masala chai. So I thought I’d share a little bit about how I incorporate these techniques into my own tea practices when I want something a little different than just leaves steeped in water.

Matcha:

Matcha is a type of ground green tea powder that is used in the traditional Japanese tea ceremony. The most authentic forms of matcha are made from tencha tea leaves that have been shaded for at least a few weeks to force the tea to concentrate some of its chemical constituents to produce a brighter green color and a richer umami flavor. It is made from a variety of green tea known as tencha. For more about traditional matcha production, I really like this overview from Ippodo.

Because the processing leads to high concentrations of certain chemical constituents, matcha has gained a reputation as a health superfood in recent years. Unfortunately, that means that there is a lot of subpar matcha on the market being sold as a supplement. Matcha is also used in baking, lattes, and other recipes, which mutes subtle flavors, so typically “culinary grade” matcha is used for these purposes. While good culinary grade matcha is absolutely drinkable on its own, it does not compare to the experience of a really nice bowl of matcha, prepared traditionally.

Personally, my favorite matcha comes from Ippodo. Since their products ship from Japan, the international shipping can be a bit steep, but if you buy a few different things, the value is still pretty good for the quality you’re getting. I tend to mention which specific matcha I’m drinking on my Instagram profile, usually for Matcha Monday. And I will use a good-quality matcha in a latte, mostly because I tend not to add much sweetener, so as to let the flavor of the matcha come through.

But matcha is primarily known for being the tea used in the Japanese tea ceremony. I’m fortunate enough to live in a city where there is an active society for the preservation and teaching of the Japanese tea ceremony. I visited the Washington DC Chado Urasenke Tankokai last year and chronicled my experience of a private demonstration and lesson in the Japanese tea ceremony, and I thought I’d share how this experience has informed my preparation of matcha.

When I make a bowl of matcha at home, I don’t follow the whole tea ceremony. Obviously, the ceremony is an inherently social, service-oriented practice, so making a bowl of matcha for myself is not the same. But I do observe some of the procedures.

First, I make sure to set out all my tools carefully before I begin. I heat my water, usually to 180 F because it will cool upon being poured out into another vessel. My first step is to pour some water into my chawan (or matcha bowl) and whisk it with my chasen (matcha whisk) a few times to moisten the whisk. Then, I empty the water from my bowl and wipe it with a cloth I use only for preparing and cleaning up after matcha. The next step is to measure out my matcha. Because I only sift matcha as needed, I place my sifter over my chawan and measure out two scoops of matcha with my chashaku (matcha scoop) and use the chashaku to gently push the matcha through the sifter. I remove the sifter and measure out two ounces of hot water in a separate cup. This, I pour over the matcha in the chawan and whisk. I whisk with a back-and-forth motion for about 15-30 seconds, until a nice froth has appeared. Then, I make a few slow circles to help break up larger bubbles.

Now it is time to savor my matcha. I like to sit in silence and enjoy my matcha, focusing on it entirely. It is a small amount, so it doesn’t take a long time, but I do roll it around in my mouth and appreciate the complex flavors. Some matchas are quite umami, or savory, in flavor, while others have varying degrees of floral, tart, or vegetal flavors.

Once I’ve finished my bowl of matcha, I clean up. This comes from my past Zen practice and the koan “Wash Your Bowl”. I take my empty matcha bowl back to the kettle, pour in some hot water, swish the whisk around in it to wash off the matcha, and then put it on the whisk stand to dry with the tines facing down so that water doesn’t run into the handle and mold. The stand also helps to keep the shape of the whisk. I empty out the chawan and wipe it with my cloth. I also wipe off the chashaku and sifter, after tapping off excess powder. Then, everything goes back into the tea cabinet. I never leave my matcha tools out, even though I’m rather bad about leaving out my other tea tools.

In this way, making a bowl of matcha becomes a meditative activity as well as a morning beverage. I don’t know if it is the theanine in matcha that makes my mornings feel brighter and calmer, or if this small meditation puts me in a good frame of mind, but my mornings that start with matcha are almost always calmer and more productive.

If you’re interested in learning more about traditional matcha, I highly recommend looking for a Chado society near you. And I give a list of matcha tools that I use on a regular basis in the information box below this video (which also shows my matcha preparation).

Masala Chai:

When I was fresh out of graduate school and freshly divorced, I moved around a lot, often living in shared houses. In one of these houses, I lived with an Indian woman and her husband. Every morning, one of them would wake up early and make masala chai. Masala chai means “mixed-spice tea” (fun fact: “chai” just means “tea,” so the Western habit of referring to spiced tea as just “chai” is somewhat like the habit of calling a caffe latte a “latte,” which in Italy just refers to plain milk) and is a blend of black tea with various spices. According to my housemate, it is made and served at all hours of the day and her family is always up for tea.

Traditionally, masala chai is often made by boiling spices and tea in milk, but my method involves preparing the tea with only water, since my housemate was lactose intolerant and would let everyone choose their own form of milk or milk substitute. So this is her method, which I quite enjoy.

First, she would put a cinnamon stick, some cardamom pods, some black peppercorns, and maybe a couple cloves or allspice berries (I prefer allspice because cloves can easily overwhelm the other spices) in a mortar and pestle and hit them a few times just to crack the pepper, break up the cinnamon, and open the cardamom pods. These would go into a small saucepan, along with a few slices of fresh ginger. This would be covered with water and brought to a boil, and then simmered for at least fifteen minutes (sometimes it would simmer for longer, as the did other things to get ready for the day). Then, she would turn off the heat and add a couple spoonfuls of loose-leaf black tea. She used loose-leaf Tetley that her family would send her from India, but I generally recreate this with a loose-leaf Assam tea. This would steep for about five minutes, and then get strained into mugs. Each person can add milk and sweetener as desired. She liked almond milk and stevia, while I usually used whole milk and honey. A very traditional way to sweeten it would be to add jaggery, which is an Indian unrefined sugar, but as it comes in lumps, it generally has to be boiled with the spices to fully dissolve.

The nice thing about masala chai is that it doesn’t require much in the way of fancy ingredients. I can get all the spices I use in the grocery store, and it generally works out well with any strong black tea. Inexpensive “English breakfast” tea blends often use strong Indian teas, so if you can’t find Assam, any English breakfast tea should work. While the tools may seem daunting, I have made this tea by smashing my spices on a cutting board with a heavy jar (it remains my favorite use for coconut oil), rather than using a mortar and pestle, and if you have a tea infuser mug, you can use the infuser to strain the tea if you don’t have a small strainer.

I will say that I’m not a fan of pre-blended loose-leaf masala chai. If I had to choose one, I would probably go with Rishi’s, because they use the most cardamom, which is my favorite, but I find that with pre-blended masala chai, you don’t get enough spice flavor before the tea is oversteeped and unpleasant. They’re nice in a pinch, but if I’m going to indulge, I do it properly by boiling the spices separately.

So those are my two “bonus levels” of tea. Perhaps in the future, I’ll expand this primer, so let me know in the comments if there are more tea topics you’d like me to cover!

NB: I have not been provided any incentive to mention any of the shops or products mentioned in this post.

The Tea Primer: Level Three

(or “Getting fancy with gong fu cha”)

Now you’ve explored a bit of the world of higher-quality loose-leaf tea. You can make yourself a pretty nice mug of tea. Perhaps you’ve even bought a few different options for teaware, like a teapot and an infuser mug. And you’ve tried a few different kinds of teas. No big deal, but you want more.

Well, this is where I want to talk about gong fu cha, or brewing based on the Chinese tea ceremony. Gong fu style brewing involves steeping a relatively large amount of tea leaf in a smaller amount of water for a series of short brews, rather than putting a small amount of leaf into a mug for a few minutes. It yields a tea session, rather than a cup of tea, and can be a wonderful way to really get to know a tea.

Before we really get into this, I wanted to point out that I am in no way an expert on the Chinese tea ceremony, nor should this be considered a guide to really “authentic” or traditional gong fu brewing. For more information about the context and history of formal gong fu cha, you can check out this article or see if there is somewhere near you to experience a Chinese gong fu tea ceremony. It’s worth noting that, in China, most people brew their tea much less formally, either grandpa-style or in a modified grandpa-style by throwing tea leaves in a pot and letting them brew as they serve it, refilling with water as needed.

Anyway, back to gong fu cha. The name means “tea with great skill” and it is, at its essence, a method of steeping tea with precision and control over the factors. This is the level at which I find it the most beneficial to consider adding things like a temperature-controlled kettle and a small scale for weighing tea. Yes, you could absolutely buy these things sooner, but if you want to have a good gong fu session, you’re definitely going to want to have more precise control over the temperature of your water and exactly how much tea you’re using.

One note on the style of this level: I’m going to talk about the techniques and general equipment, and give a sort of “buyer’s guide” at the end, rather than interspersing vendor recommendations with the instructions. You can also check out my previous post about “Getting Started with Tea on Amazon Prime” for some recommendations on teaware that I use.

So here are the basics: You take a small vessel, usually around 3-5 oz. (90-150ml) and fill it approximately ⅓ of the way with tea leaf, and then fill with water. You steep the tea for seconds, maybe 10-30 seconds at first, and then strain it into another vessel to serve. The steeping is repeated as many times as you get flavor out of the tea, typically adding on 10-15 seconds to each steeping. It is also not unusual to rinse the tea before the first steeping. Typically Chinese tea cups are much smaller than Western tea cups, sometimes only an ounce or two in volume, so a 150-ml teapot can yield tea for more than one person (or you can drink the whole thing yourself). It is important to note the difference in vessel size so that you’re not surprised by the size of your teaware when it arrives. When my husband bought me a 60-ml teapot recently, he thought he’d been sent the wrong thing at first when he saw how absolutely tiny it was. Yes, it’s supposed to be that small — you’re brewing a tea session, not a single cuppa to linger over.

The essential tools for gong fu brewing are a vessel for steeping and a vessel for drinking. The classic example of a steeping vessel is the gaiwan. This is a small cup, usually made of clay or glass, that has a cover. The cover helps keep volatile oils from evaporating during steeping, and also serves as a way to strain leaves out of the tea when you move it from the steeping vessel to the drinking vessel. The drinking vessel can be anything, although if you have quite a small brewing vessel, straining into a large mug can look and feel a bit silly. That said, I routinely use a gaiwan for steeping and strain it into an English tea cup.

From there, you can add elements to make your tea brewing experience more refined. Some people like to strain their tea more than the lid of a gaiwan allows, and use a mesh strainer over their drinking or serving vessel. Some prefer to strain into a serving pitcher and move it to drinking cups from there (this is particularly useful when your cup is slightly smaller than your brewing vessel). And going further, in the most formal tea ceremonies, tools such as picks, scoops, and tongs are used to handle the tea and teaware to avoid the oils and dirt from your hands from contaminating the tea. Finally, since gong fu brewing can involve a fair amount of spilling and discarding liquid, some people choose to use a tea tray with a draining base so they can simply pour the liquid through. Personally, I either use a discard vessel, or else brew outside on my wooden deck, which acts as a sort of giant tea tray.

Additionally, not all gong fu brewing has to be done in a gaiwan. There are also small Chinese teapots that can serve as a brewing vessel. While glazed porcelain is common, some pots are unglazed and made of materials like clay or silver, which are thought to alter the taste of the tea in interesting ways. Unglazed clay can also supposedly pick up a kind of season, and when used for one tea or one type of tea, and impart complexity and additional flavor as they take on more of that kind of tea. Personally, I have two teapots that are unglazed on the inside, one for oolongs (particularly bug-bitten “honey” oolongs) and one for ripe pu-erh, but I generally brew in glass or glazed porcelain so that I don’t have any concerns about using any teaware for any tea in my cupboard.

Alright, so let’s imagine that you’ve just received your first gaiwan. Time to brew some tea, right? Not so fast. I highly recommend you practice moving liquid into and out of your gaiwan, without the pressure of actually steeping a cup of tea (and the hazard of hot water). There is a bit of a learning curve with gaiwan brewing, and I had my fair share of spilled tea and burned fingers when I started out. Indeed, even after years of practice, I have bad days where I just can’t seem to strain from the gaiwan properly. This will also give you the chance to get an idea while gaiwan “hold” you like best. The trick is to be able to hold the edge of the pot and keep a finger on the lid to keep it from falling off, all with one hand. The two basic holds are holding the edges of the bowl with your thumb and middle finger, while keeping your index finger on the lid, or holding the whole thing (with saucer, if you have one) in your hand, while keeping your thumb on the lid. These holds are demonstrated in the photos below.

Okay, so you have a gaiwan and you know how to use it. Time to steep some tea! Wait, no. There are still two more tools you should consider getting: a temperature-controlled kettle and a digital scale. As I said earlier, you can absolutely buy these things sooner, but for gong fu brewing I find them more necessary. The whole point of gong fu cha is having control over the brewing of the tea, and it’s important to know how much tea you’re using and how hot the water is. On a more practical level, I’ve definitely had trouble eyeballing how much rolled oolong tea to use and ended up with a gaiwan so cram-jam full of leaves, once they’d expanded in the water, that I can barely get water into the gaiwan. Weighing your leaf gives you a better idea of how much tea you really need. For reference, this photo shows the same weight of three different teas:

Finally, now can we brew some tea? Okay, you’ll want to start by determining how much tea you need and how hot to heat your water. Again, the amount of tea, the temperature, and the steeping time are all things you can play around with to get your favorite iteration of a particular tea, but I find that a good starting point for amount of tea is to use approximate 1-1.5 g of tea per ounce (30 ml) of water. So for a 150-ml gaiwan, you would use about 5-8 g of tea (for reference, the typical tea bag contains about 2 g of tea, which makes an entire mug, so this is a lot of tea for a small amount of water).

Water temperature will vary by tea type, and generally it’s good to start brewing black teas at 200-212 F (95-100 C), oolongs at 180-200 F (80-95 C), greens at 160-180 F (70-80 C), and white teas at 180-195 F (80-90 C). Ripe pu-erh teas can handle boiling water, while raw pu-erh teas benefit from being treated a bit more gently and may prefer water at 195 F (90 C). From there, you can follow the troubleshooting in previous levels to adjust water temperature (or tea amount).

The steeping method is often called “flash infusion” as the tea is brewed for a very short time. It’s usual to give the tea a rinse, particularly for rolled or compressed teas. The rinse gives the dry tea a chance to take on some water and start to open up, and in the case of aged teas, can help rinse off any dust that may have settled. To rinse the tea, pour some hot water over it in the brewing vessel, swirl it once or twice, and strain it into your other vessels. I like to use this rinse to warm the teaware. Then, discard the rinse (or taste it, if you want).

Once you’ve rinsed your tea, it’s time to start steeping. Start with 5-30 seconds. It sounds like an absurdly short amount of time, but it really does give you a fuller picture of how the tea opens up. I like to stick to this guideline the first time I try any particular tea. For black teas and pu-erhs, I definitely stick to the 5-10 seconds for a first steeping, but for green and white teas, I usually extend the first steeping to 20 seconds, and for rolled oolongs, I start with a 30-second first steeping. It is a bit frantic, particularly if you haven’t perfected your gaiwan hold, but do the best you can to steep it and strain it quickly.

Then, taste the tea. This isn’t tea to gulp. You’re brewing this way to get to know the tea, so take your time. Smell it. Write things down. Write down exactly how you steeped your tea and how it turned out.

Then, repeat, adding 5-10 seconds onto each subsequent brewing. The flashest of flash steeping sessions is the method recommended by the company White2Tea, where you rinse, and then steep the tea for 5 seconds, 10 seconds, 15 seconds, and so on, for up to ten steepings. Personally, I tend to start with 10 seconds for a first steeping because I don’t often find a tea where that first 5-second steeping doesn’t just taste like a second rinse.

As you take notes, you can experiment with brewing parameters. Some teas want to be pushed. Some teas release a lot of flavors quickly and could be pulled back with a shorter steeping. I’ve actually salvaged some green teas that I thought were unpalatable at first by cooling off the water and steeping for shorter times at first. Play around with it, but write things down, so you can repeat the sessions you enjoy.

Alright, now I want to talk a little bit about where to buy your teaware for gong fu brewing. While I’ve mentioned my Amazon post, I don’t actually prefer to buy most things from Amazon. The two things that can definitely come from somewhere like Amazon or Target are an electric kettle and a digital scale. I prefer a scale that is precise to at least 0.1g (both of mine are precise to 0.01g), so that I don’t have to worry about the precision of the scale affecting my steepings. I have this one at home and this one in my office.

Kettles are a whole different rabbit-hole. Personally, I’ve never bought a fancy gooseneck kettle, though I can see how the control could be helpful with filling smaller teaware. But I’ve used the Chefman programmable kettle my husband bought me for Christmas for the last couple of years. Before that, I think I just picked something up from Target. But any decently-rated kettle that allows you to control the temperature to within 10 degrees Fahrenheit should work fine. It’ll probably run you at least $25-50.

Okay, now onto the fun stuff. The thing about teaware is that there is just such a wide array of beautifully-crafted things that you can use to make tea. You can choose to get matching pieces or sets, or you can pick and choose and put together an eclectic collection. I can’t get into all the artists that I’ve patronized over the years here, so definitely check out my YouTube channel to see my teaware collection in action. But a good starting point is Teaware.House and Yunnan Sourcing. Both have a large variety of teaware at a variety of price points, and tend to be very up front about the volume of the pieces they sell, so you can put together a set that works for you.

I would recommend starting with at least a gaiwan and a cup that is approximately the same volume as the gaiwan (or a gaiwan, a pitcher, and a smaller cup). A good starter gaiwan size is 100-150 ml. A smaller gaiwan will allow you to experiment more while using less tea, while a larger gaiwan will allow you to get a little more tea out of a single steeping and perhaps give you the chance to linger over each cup a big more. You can also start with a “travel” or “easy” gaiwan set, which fits together so that the cup is like a lid for the gaiwan. This incorporates the two essential items of gong fu brewing into one set and is very convenient. If you’re picky about leaf debris getting into your cup, you can also pick up a strainer (though I rarely use one), and if you’re serious about gong fu cha, there are further tools that you can check out in the article I linked earlier about the traditional method.

As far as sourcing teas, there are some good resources in Level Two, but here is where I would suggest checking out one of the more daunting tea sellers, like Yunnan Sourcing, or their sister site Taiwan Sourcing, for Taiwanese oolongs. I find that gong fu style brewing works particularly well with Chinese and Taiwanese tea, probably because the brewing techniques originated with those cultures. If you want to dive into the pu-erh rabbit hole, Yunnan Sourcing has a huge variety, but I also have enjoyed what I’ve gotten from White2Tea. They also sell other types of tea, which I’ve tried and reviewed in the past. One note: Yunnan Sourcing in particular can be incredibly intimidating to order from. If you don’t have a tea style in mind, or you’re not the kind of person to just try things blindly, try one of their samplers or contact Scott. He’s extremely nice and helpful and pretty responsive over email and Instagram DM. He also has a great YouTube channel where he posts videos of himself and his wife (and guests) tasting and discussing various teas that they sell.

Once you’ve bought your first gaiwan and started experimenting with gong fu brewing, it will probably be a matter of time before you’ve developed a bit of a collection of both tea and teaware. So perhaps, also consider thinking about getting a new cabinet to store your newfound hobby tools in. But that is a discussion for another time. There is so much more to say about the world of tea, but I will leave this guide there and allow you to explore from there.

Level Three: The Brief Takeaway

  1. Gong fu cha (“Tea with great skill”) is based on the Chinese tea ceremony and involves the precise brewing of tea.
  2. A larger volume of tea is steeped in a smaller vessel for a shorter amount of time, and resteeped to experience how the tea changes over time.
  3. You need a steeping vessel and a drinking vessel, though further elements can come in handy. This is also the point at which you want to consider getting a digital scale and a programmable kettle.
  4. Chinese teaware is much smaller than Western teaware, with brewing vessels being around 100-200 ml.
  5. The classic brewing vessel of gong fu cha is the gaiwan, which is usually around 100-150 ml. Practice handling your gaiwan before you add hot water to the equation.
  6. Start with 1-1.5 g of tea leaves per 30 ml of water.
  7. Start with water temperatures of: 200-212 F for black tea, 180-200 F for oolong tea, 160-180 F for green tea, 180-195 F for white tea, 212 F for ripe pu-erh and 195 F for raw pu-erh.
  8. Rinse the tea and then steep for 5-30 seconds at first, then increase each subsequent steeping by 5-10 seconds. Steep until you stop enjoying the tea, sometimes as much as 10 times.
  9. Take notes on how you prepared the tea and what the result was for each tea session.
  10. To start your tea collection, take a look at Teaware House and Yunnan Sourcing for a variety of Chinese teaware at different price points.

Coming Soon: Bonus Level! Some tea techniques that don’t fit into the basic primer…

NB: All vendors mentioned in this post are vendors that I have used and liked, and I have received no compensation for recommending them.