The Tea Primer: Level Two

(or “I’m ready to try loose-leaf tea” or “What do I do with this tea someone bought me?”)

Alright, so perhaps you have an idea about tea. Maybe someone bought you loose-leaf tea, either as a gift or maybe as a souvenir. Or perhaps you’re just ready to move up in the world (I kid). Well, making the leap to loose-leaf tea is a big step in the tea world. You’re no longer clinging to the convenience of tea bags and you now have not only a whole world of new teas you can try that simply aren’t available bagged, but you also have choices to make concerning tea ware. At this level, I’m still going to stick to Western-style brewing, but you’ll be able to have a bit of fun with your tea ware.

First of all, nothing really changes about the type of tea you can brew. The main categories are black, green, white, oolong, and pu-erh. But because different varieties of tea are often not sold in bagged form, you have a world of new varieties open to you. Tea is grown primarily in Asia, with some grown in Africa, and North and South America. Most of my favorite teas come from Asia (although one of my favorite black teas comes from Tanzania). For the novice starting out, I would recommend trying black teas from India, Africa, and China; green teas from China and Japan; and oolongs from China and Taiwan. Pu-erh is a tricky category because, technically, all pu-erh comes from Yunnan province in China, though other regions make teas processed in the same way.

When trying black teas, the classic black teas are Darjeeling, Assam, and Ceylon from India and Sri Lanka, as well as Keemun from China. I also am quite partial to Dian Hong from China. For green teas, I recommend trying Long Jing and Mao Feng from China and Sencha from Japan. Oolongs are a rich and varied category of tea, but if I had to narrow it down, I’d say that Tieguanyin and Wuyi oolongs from China, as well as Dong Ding and Alishan oolongs from Taiwan are a good place to start. For white tea, my first white tea was Silver Needle. There is some disagreement about whether or not this is a good starter white tea, but I quite liked it. Pu-erh is quite a more daunting category of tea, and honestly, I find most pu-erhs are more suited to Chinese-style brewing, which I’m saving for the next level.

But where do I get these teas? Well, one of my favorite places to look for all different types of tea from around the world is a company called What-Cha Tea. They’re based in the UK, but shipping to the US isn’t terrible. And they have one of the most generous minimums for free international shipping. They offer tea from all over, though the variety can be daunting. But I’ve loved everything I’ve gotten from them, and in fact, that’s where I got my very first white tea (and how I fell in love with white tea). Another place for the new tea-drinker to get Chinese teas is Teavivre, which I featured in part two of my guide to getting started with tea available on Amazon, because they have a number of teas available on Amazon Prime. For Taiwanese teas, I also really love the Beautiful Taiwan Tea Company. And Rishi Tea has some good loose-leaf offerings, particularly if you can find them in your local grocery store. For Indian and African black teas, I also like Harney & Sons.

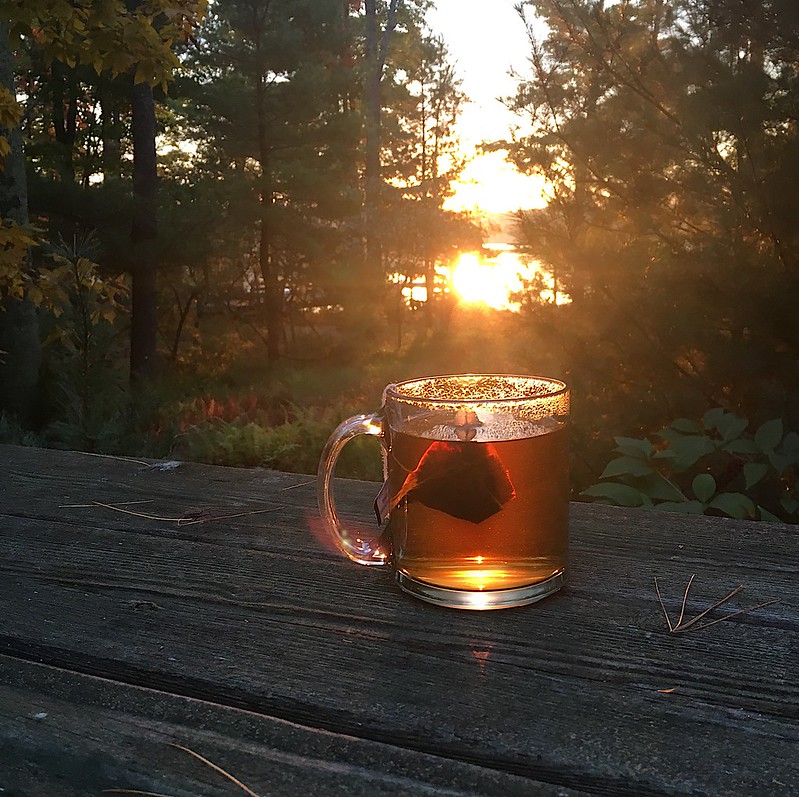
Now, let’s talk equipment. The simplest way to brew loose-leaf tea would be something that has come to be called “Grandpa style” among Western tea enthusiasts, a term coined by blogger MarshalN to describe how his grandfather drank tea. This is also how a lot of my Chinese and Korean colleagues over the years have drunk their tea. I’ve talked about it before, but simply, you put the tea in the bottom of a large mug and add hot water, and then drink the tea with the leaves still in it, adding more water as the tea gets too strong. Obviously, this will not work for all kinds of teas, and I’ve found it best suited to certain oolongs and very delicate green teas that don’t oversteep easily. I’ve never tried it with pu-erh, personally, but I’ve heard good things. The benefits are that you don’t need much in the way of equipment — just a mug — but the drawbacks include the fact that it can be a bit odd to drink your tea with the leaves still in it.

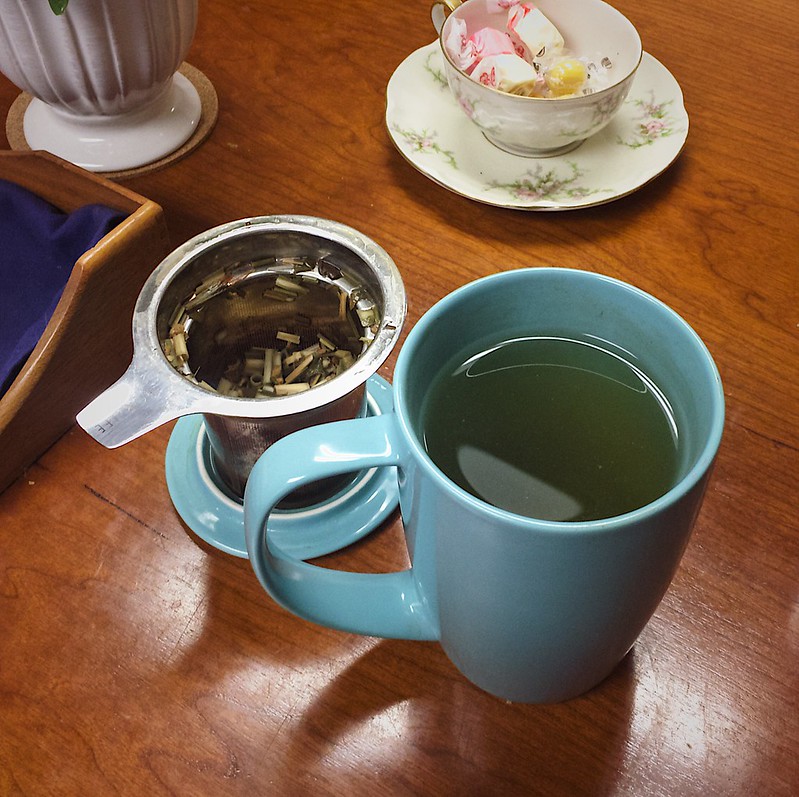
So what if you want to strain the leaves out of your tea? Some people like to use something like a “tea ball,” which is basically like a refillable metal tea bag that you fill with a little tea and dip into the tea to steep. Personally, I find that these don’t really allow the tea enough room to expand and move around in the water and prefer a larger, basket-style infuser. My number one recommendation for a first loose-leaf infuser mug is the FORLIFE Tall Curve Mug. It has a nice big basket, and the lid doubles as a coaster for your infuser so you can keep it close for a second (and third and fourth…) steeping. I started out with a FORLIFE Asian-style Curve mug and and switched to the Tall Curve mug because I found the handle-less design got a bit hot for my hands. I used Curve mugs for years, though, before I ever got any of my fancier teaware. If you’d rather steep your tea in your favorite mug, FORLIFE also offers just an infuser that can sit in basically any mug.

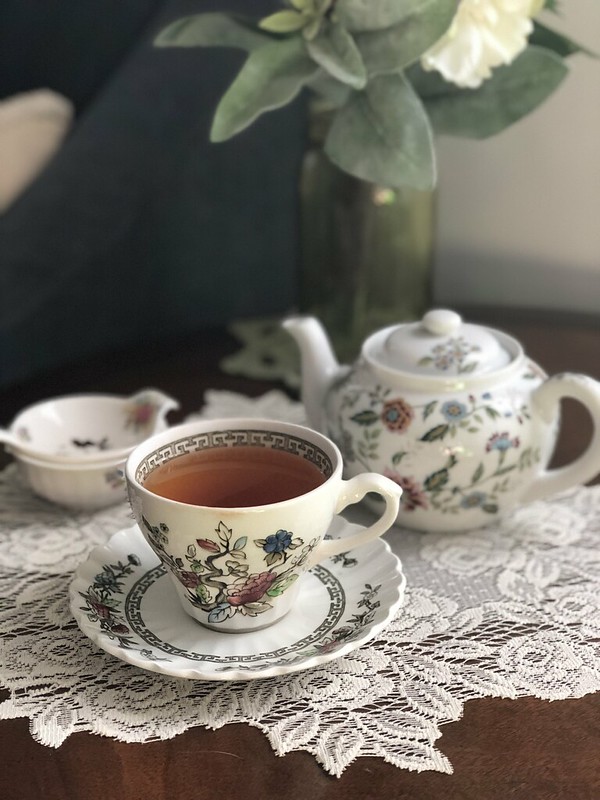
Okay, but what if I really want to brew my tea in a teapot and pour it into a dainty cup and saucer for sipping? Well, something like the FORLIFE Stump or Curve teapots is nice, depending on how much tea you want to brew at a time. Remember, if you get a 24-oz. Teapot, you’re basically brewing 2 mugs (or 3-4 cups) of tea at a time. These have the benefit of having a removable brewing basket so you can brew the pot of tea, remove the tea leaves once it’s steeped, and then cover and keep the pot warm while you drink it. Something like a tea cozy is helpful for this, but in a pinch, a knit winter hat will work (in fact, my tea cozy is one that I made by modifying a hat pattern to include holes for the spout and handle).

You can also get a teapot without an infuser and strain the tea into the cup using something like this over-cup strainer, but the drawback to that is that you can’t remove the tea leaves from the rest of the pot and later cups of tea will be stronger than the first. Personally, I deal with this when I use my vintage tea pots by refreshing my cup of tea before I’ve completely finished it, and then adding more water when the tea is just too strong, kind of like a modified version of grandpa-style brewing, actually. I find this works best with black teas that I also like to drink with some milk or sugar because I can add more milk as the tea becomes too strong, or else when I’m making tea for a large group and I know we’ll finish the whole pot at once when I serve everyone and can just re-brew for the next round.

One last question remains: How much tea do I use? Well, at this point, I’m still trying to keep things away from being the most complicated they can be, so I’ll offer suggestions on measuring tea volumetrically. The standard “one teaspoon per cup” rule doesn’t really work if you have teas that are varying levels of fluffiness, but you can estimate. Basically, “one teaspoon per cup” tends to work best with Indian black teas like Darjeeling or Assam. They have smallish, curly, but not tightly-rolled leaves. If you’re using a fluffier tea, use more like two teaspoons per cup. And if you’re using a tightly-rolled tea, use a scant teaspoon per cup. And remember that if you’re using a big mug like the Curve, you probably want to consider that at least two cups.

So, as an example, if I’m making myself a cup of standard black tea (perhaps the lovely Darjeeling blend from Harney & Sons) in my FORLIFE Curve mug, I would add about two teaspoons of tea leaves to the infuser in the mug, and then pour boiling water over it. I would let it steep for three minutes, and then remove the leaves, setting the infuser on the upside-down lid to serve as a coaster. After I’d finished my cup of tea, I could return the infuser to the mug, add more boiling water, and let it steep for four minutes this time before removing the leaves and enjoying another cup of tea.

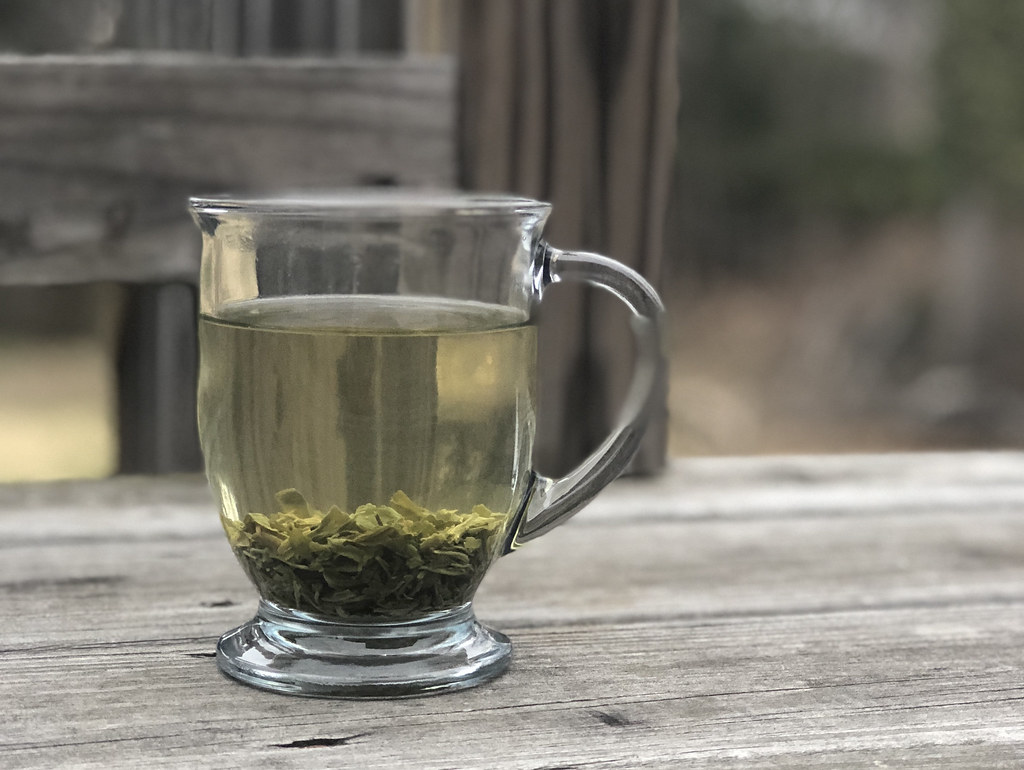
Our trouble-shooting techniques are largely the same, with one addition: If your tea is too weak, you can now also add more leaf. Adding more leaf will also give you a better shot at getting multiple infusions out of a tea. Personally, I like to use nearly a tablespoon of most tea leaves for a mug of tea. If I’m drinking a particularly fluffy tea, I’ll use a rounded tablespoon, and for tightly-rolled teas, I’ll use a scant tablespoon. It’s honestly amazing to see how much these tightly-rolled teas will expand over the course of a few steepings. And look at your tea — if it has hardly expanded or unrolled at all after the first steeping, you can still get plenty more goodness out of it. A tea shouldn’t be spent until you can see that it has fully expanded into an almost-fresh-looking tea leaf.

Level Two, the Brief Takeaway:

  1. If you opt for loose-leaf tea, you have a world of varieties open to you! Try some of everything.
  2. What-Cha is a great place to try teas from all over the world. Other good places to check out are Teavivre, Rishi Tea, Beautiful Taiwan Tea Company, and Harney & Sons
  3. If you don’t mind sometimes eating a leaf, you can brew your loose leaf tea grandpa-style.
  4. If you want an infuser, a good choice is a mug with an infuser basket, like the FORLIFE Curve mug. If you definitely want a teapot, a teapot with an infuser basket, like the FORLIFE Stump teapot will be easy to use.
  5. Start with about one teaspoon of tea leaves per cup of water, adding more volume if you’re using fluffier tea and less if you’re using tightly-rolled tea. Remember that a large mug or teapot counts as two cups and adjust tea leaf amount accordingly.
  6. Now you can troubleshoot your tea by adjusting how much leaf you use, in addition to the methods in Level One.

Next Week: Level Three, or “Getting fancy with gong fu cha”

NB: All vendors mentioned in this post are vendors that I have used and liked, and I have received no compensation for recommending them.

The Tea Primer: Level One

(or “I’ve only ever tried supermarket tea bags”)

I want to start this section off by saying that there is not necessarily anything wrong with supermarket tea bags. I will even make myself a cuppa from a standard tea bag every now and then (usually when traveling). If what you’re after is a strong brew that can stand up to plenty of milk and sugar, standard tea bags might be the best thing for you. But they do not contain the best quality tea. And paying more for “fancy” tea bags is often not worth the money.

Generally, tea bags are filled with what are called “fannings.” In order to understand what these are and why they aren’t great, it’s necessary to explain a little about tea grading. In the British system of tea grading, teas are graded by leaf size and whole-ness. So basically, leaves are placed in a series of progressively finer sieves, where the larger full leaves sit at the top and the smaller leaves and broken bits fall to lower levels. At the bottom of this hierarchy are the fannings and dust, which are the lowest size grade of tea. Now, none of this takes into account the initial quality of the leaves being sorted, but in general, larger, whole leaves behave differently in water than more broken leaves, and these fannings are the lowest grade of that.

When tea leaves are broken up, the brewer begins to sacrifice control over the brewing process because more leaf surface is exposed to water, making flavorful compounds come out into the water faster. The problem comes because not all flavorful compounds are full of good flavors, and when you brew fannings, you will extract the less pleasant flavors with the good flavors more quickly. This can lead to an unpleasantly bitter or tannic cup of tea that is best covered with some dairy and sugar. These unpleasant flavors can also overpower the more delicate flavors in the tea.

So I’ve convinced you that tea bags are the worst and you want to stop using them. Well, not so fast. Most commercial tea bags sold in the supermarket are full of fannings and dust and don’t really exhibit much flavor nuance unless they have other flavorings added. But not all of them are so. And I recognize that not everyone wants to jump right into loose-leaf tea.

This is where full-leaf tea bags come in. These are tea bags, yes, but they are filled with higher-quality, whole tea leaves. Sometimes called “sachets” to differentiate them from standard tea bags, they are often made in a pyramid shape, so that the tea leaves have more room to expand as you steep them and they swell in the water, allowing for a better extraction of flavor without sacrificing control over the steep by breaking up the leaves.

One of my favorite brand of full-leaf tea bags is Rishi Tea. I purchased these to serve at my wedding and it’s what I carry with me when I travel. They have a nice variety of teas and herbals available in pyramid-shaped bags, and can give the tea novice a nice introduction to the world of teas, though most of their bagged teas are flavored in some way. That said, they have one type of unflavored black tea and two types of standard, unflavored green tea available in sachets (plus their Matcha Gyokuro, which might be a bit odd for a novice tea-drinker – I’ll talk more about matcha in a future post!).

Another brand that offers tea bags is Harney & Sons. Again, many of their bagged offerings are flavored, but they have a decent selection of pure teas, for those just getting started. I also like Mighty Leaf Tea sachets, which are large but not pyramid-shaped. They offer a hojicha roasted Japanese green tea in a bag that would be great to try, particularly if you’re a fan of roasted flavors. Additionally, Teatulia offers a variety of bagged whole-leaf teas, including unflavored offerings of black, white, green, and oolong teas.

If you’re keen to try pu-erh tea and want to stick with bags, Teavivre offers bagged pu-erh teas. They offer a plain ripe (shu) and raw (sheng) pu-erh, as well as varieties flavored with rose, chrysanthemum, or rice. For more variety of oolong teas, my friend Nazanin of Tea Thoughts found some high-quality bagged oolong tea from Esteemed Tea Co. for her “Steep It Real” tea gift box. One thing to note with these oolong teas is that they are all unflavored and the “honey” oolong refers to the natural honey aroma that occurs in some types of oolong tea.

Of course, you may want to try some of those flavored teas. I would highly recommend you start with more traditional flavorings and leave the blueberry-vanilla-mango tea for a bit later on in your tea explorations. Traditional flavorings are things like Earl Grey, which is a good black tea scented with bergamot, or masala chai, an Indian blend of black tea with spices like cinnamon, cardamom, black pepper, and ginger. For green teas, I like jasmine green tea, though it can be difficult to find a tea that isn’t cloyingly floral-scented. Other classic flavorings for teas are rice (such as in genmaicha green tea, which is often served in sushi restaurants) and chrysanthemum. For my wedding, since they are generally crowd-pleasing, I served Earl Grey and Jasmine Green teas from Rishi Teas. But it is a good idea to get a variety of pure, unflavored teas to get an idea of what the teas themselves taste like.

Now that you have the tea bags, what do you do with them? Well, in order to make tea, you need tea leaves and water. In most cases, people generally prefer to have some way of removing the tea leaves from the water after the tea is brewed. In the case of a tea bag, the removal of leaves is trivial, so all you need is a cup of some sort in which to brew your tea, along with water of the appropriate temperature.

Ah, temperature. The perpetual question and battle of the tea novice vs. the tea master. You may ask, is the temperature of the water really that important? The answer is yes and no. Basically, tea comes with certain brewing instructions that tend to vary by the type of tea (although plenty of brands use the same instructions on the packaging of all of their teas). But these instructions are not rules. I like to say that brewing instructions are like the pirate’s code: they’re really more like guidelines.

So with bagged tea, the things you can control are the tea bags you choose, how much water you put in, the temperature of the water, and how long you leave the tea in the water. All of these will affect your final brew, although it’s not always about better or worse. I think the first rule of tea is to make tea the way you like it. If you follow the instructions to the letter and you don’t like the result, try something a bit different.

One of the main questions I get asked is how I know what temperature at which to brew the tea. The short answer is that it depends on the tea. The longer answer is that more robust, oxidized teas tend to like hotter water, while more delicate, less-oxidized teas like cooler water. But, like all of these guidelines, they’re not set in stone. And you can fine-tune a tea by playing with water temperature alone a lot. Cooler water will extract the flavors more gently, and I’ve actually found that steeping a black tea that tends towards bitterness in a slightly cooler water will yield a smoother brew.

Okay, but what are the starting points? Well, black tea and ripe pu-erhs like full boiling water. Green and white teas will want water that is considerably cooled off from boiling, and oolongs will fall somewhere in the middle. After trying a tea at a given temperature, if the tea feels harsh, I’ll drop the temperature. If I feel I haven’t gotten enough flavor out of it, even after a long steeping, I might try hotter water. In the case of green teas in particular, sometimes too-hot water will yield a tea that tastes quite a bit of bitter, boiled spinach. Dropping the water temperature even more often helps. One thing that can be helpful to remember, if you’re watching your water boil, is this rough correspondence between temperature and bubble size in water.

But what exact temperature do you mean? Well, at this first level, I would say that precision might not be that important. In fact, when I first started out, I didn’t have a temperature-controlled kettle. I would boil my water and let it cool off to get under-boiling water. I would set a timer and let the water cool off for a bit, and if the resulting tea tasted off, I would let it cool off more next time. It’s imprecise, but for the new tea-drinker, just letting the water cool off from boiling, rather than chucking boiling water over your most delicate teas will already be an improvement.

The other part of the equation is how long your tea steeps. This will vary by the steeping method, but for tea bags, I’m assuming brewing will be done “Western-style,” which involves a relatively small amount of leaf brewed in a large-ish (8-12 oz.) vessel for minutes, rather than tens of second (oh, stay tuned for later posts for that). From there, try brewing your black teas for 3-5 minutes, your green and white teas for 2-4 minutes, and your oolongs for 3-4 minutes. Ripe pu-erh can go for five minutes or more because good pu-erh stays silky smooth even with the longest brew time and bad pu-erh will be horrible no matter what you do with it. Again, if something seems off, fiddle with the brewing time. Longer brewing times will yield stronger flavors and shorter brewing times will mellow odd flavors.

One final note about good-quality, full-leaf tea: It can and should be brewed more than once. Remember how I said that whole leaves allow flavors to be released over time? Well, that can mean even longer than a single brew. I always brew my full-leaf tea at least twice, with the second steeping getting 30 seconds to a minute longer than the first, for Western-style brewing. So save your tea bag in a little dish and make a second cup of tea with it when you’ve finished the first. You can even try brewing it again and again, until you feel you’ve gotten all the flavor out! So if you’re the type of person who drinks a few cups of tea per day, you might be able to get away with one tea bag for the whole day, which will help soften the blow of the cost of good-quality tea a bit.

The Brief Takeaway, Level One:

  1. Switch from standard, dust-filled tea bags to full-leaf tea bags. Some places to check out are: Rishi Tea, Teatulia, Esteemed Tea, Teavivre, Mighty Leaf, and Harney & Sons.
  2. Pay attention to the temperature of your water, but remember that “brewing instructions” are just guidelines.
  3. Start with boiling water for black tea, and then less-boiling water for oolong tea, and even less-boiling water for green and white tea. You don’t necessarily need to know the exact temperature, but remember how you heated your water so you can experiment if needed (or so you can reproduce a good brew later!).
  4. If you’re brewing your tea in a mug, start with 3-5 minutes for black tea, 2-4 minutes for green tea, and 3-4 minutes for oolong.
  5. If your tea is too weak, try hotter water or a longer brewing time. If the tea is too strong or tastes off, try cooler water or a shorter brewing time.
  6. You can brew your full-leaf tea more than once! Add on some time for each subsequent brew.
  7. Above all, make tea the way you like it!

Next week: Level Two, or “I’m ready to try loose-leaf tea”

NB: All vendors mentioned in this post are vendors that I have used and liked, or that come recommended by those I trust, and I have received no compensation for recommending them.

The Tea Primer: Prologue

(or “So you’re interested in tea…”)

I think my ultimate goal with this piece is to end up drawing in readers who google “How to tea?” or “How do I even tea?” or “What to do with this tea?” As someone who has been drinking tea in various forms for at least thirty of my thirty-five years, I’ve had a varied evolution to the gong fu-brewing, matcha-whisking tea enthusiast who graces the pages of this blog. And many people in my life and who read my blog simply aren’t interested in the nuances of sheng vs. shu pu-erh or the terroir of oolong tea. Many of them just want to try something nicer than Lipton’s tea bags, or want to know what to do with this loose-leaf tea their friend gave them, or want to know what they really need to get started trying better-quality teas.

A note about motivation: If you’re here because you want to switch from a different source of caffeine to tea because you think it’s somehow healthier, this is probably not the place for you. I can’t teach you how to enjoy tea, and I can’t speak to any particular health benefit of tea over coffee. I personally made the switch from drinking primarily coffee to drinking almost exclusively tea, but I had been enjoying tea for decades before that. I merely made the cost-benefit analysis for my own personal body. I actually love coffee, but it doesn’t love me back, so I limit it to once a week (unless I am in Europe, in which case, I suffer the consequences with wild abandon). And I feel absolutely no deprivation because I also love tea.

But if you’re here to find out how to dip your toe into the tea, I hope you find this helpful. This primer will be organized into layers of tea enthusiasm, from least to more complex (I don’t claim to be a tea expert and couldn’t possibly write about the most complex layers of tea). I’ll start out talking a little bit about tea and what it is, though this will hardly be an exhaustive education. If you’re interested in more about the processing that goes into making the different types of tea, I highly recommend A Little Tea Book, or else check out Sebastian’s website, In Pursuit of Tea, where he offers a brief description of tea types in his “Tea 101” section.

Okay, so. Tea. The first thing is that, while “tea” can colloquially mean the infusion of pretty much any plant matter in water, what I mean when I say “tea” is an infusion of the leaves, buds, and/or twigs of the Camellia sinensis plant. True “tea” comes from one species of plant, which is why I generally refer to herbal brews as “infusions” or “tisanes.” I love my herbal infusions as well, but they are not tea, to my mind. So with that in mind, what follows is a guide to the levels of enjoyment of Camellia sinensis.

Despite only coming from one species of plant, tea comes in many different types. Most westerners are familiar with “black tea,” which is made with tea leaves that have been completely oxidized before being heated to stop this process. That said, green tea, which is heated to stop the oxidation process before being dried, has also gained popularity in recent years. Additionally, white tea has also appeared on the mainstream tea scene in the US recently. White teas are only dried and are not heated at all after harvesting. Rounding out the main types of tea are oolong tea, which is oxidized to some extent, and pu-erh tea, which are aged or fermented.

Much of a tea’s flavor profile will come from its processing. Black teas are often described as richer, fuller-bodied, with flavors of tannin, malt, and dried fruits. Green teas are generally more delicate, with flavors of green vegetables or grass, while white teas can be intensely floral, belying their light colored brew. Oolongs have a wide variation, because “oolong” can describe a wide variety of processing techniques, and can range from creamy “milk” oolongs to floral-honey bug-bitten oolongs to cannabis-y roasted oolongs. Finally, pu-erh comes in raw or ripe and can range in flavor from similar to white teas to redolent of damp earth and mushrooms.

When choosing starter teas, you’ll want to consider price, convenience, availability, and your own personal tastes. If you like really funky Islay whisky, consider giving ripe or shu pu-erh a try (despite the fact that a colleague of mine refers to it as “shoe” tea because of the aroma of earth and leather). If you’re a green juice fanatic, you might prefer to start with green teas, and if you’re a staunch traditionalist, the world of available black teas is hardly basic. Personally, I came late to the oolong and white tea games, so I tend not to think of them as starter teas, though they absolutely could be. The trick is to find decent examples of them for a reasonable price and without having to look too hard.

Before we begin, I want to say something about how I’m setting this up. I’m calling the various chapters of this primer “levels,” but not as a way of denoting superiority. It’s more like the levels in a dungeon-crawling game. Just because you’ve “passed” one level doesn’t mean you can’t revisit it. And you should feel free to spend as much time on any given level as you’d like. Don’t worry about being a completionist.

From there, the main question is: Now what do I do with these dried leaves? And that, gentle reader, is where we begin.

Next week: Level One, or “I’ve only ever had supermarket tea bags”

An Autumn Recipe: Pumpkin Loaf

I’m not a pumpkin-spice latte kind of person, but one spiced offering I do love is pumpkin bread. When I was in college, my favorite afternoon snack was a thick slice of pumpkin bread with a little pot of cream cheese to spread on it from the cafe in the library. During the years I lived alone, I would often make a trip up to the library for a cup of tea and a slice of pumpkin bread during exams, simply because I would otherwise not interact with another person for days on end.

So with the turning of the seasons, I felt it was time to bake a pumpkin bread to enjoy with my tea. I like mine with cream cheese. This is a very lightly-sweet bread, so if you prefer a sweeter snack, perhaps pair it with a sweetened cream cheese (beat a few tablespoons of maple syrup or honey into eight ounces of cream cheese for a sweeter spread). But I like it barely sweet, made with hearty whole-grain flours, and studded with pumpkin seeds instead of nuts.

Pumpkin Loaf:

(based on this recipe from Cookie and Kate)

1 cup of sprouted spelt flour (or whole-wheat white flour)
3/4 cup all-purpose einkorn flour (or regular all-purpose flour)
1/2 tsp. salt
1 tsp. baking soda
1 tsp. cinnamon
1 tsp. ground ginger
1/2 tsp. allspice
1/4-1/2 tsp. freshly grated nutmeg
2 eggs
1/2 cup dark maple syrup
1/3 cup ghee, melted
1 cup canned pumpkin puree
1/4 cup water
1/2 cup pumpkin seeds (I use soaked, salted, and dehydrated pumpkin seeds)

  1. Preheat oven to 325 degrees and grease a loaf pan and line with parchment (I used an 8.5″x4.5″ pan).
  2. Whisk together the dry ingredients: flours, spices, baking soda, and salt.
  3. Whisk together the eggs and maple syrup until well-mixed, then add the pumpkin puree and mix well. Drizzle in the melted ghee while whisking to emulsify.
  4. Add the wet mixture to the dry mixture, along with a 1/4 cup of water, and stir together. Fold in the pumpkin seeds.
  5. Spread the mixture in the prepared pan and bake for 60-75 minutes, until a tester comes out with only moist crumbs (or until it reaches 190 degrees internally).
  6. Allow to cool for a half an hour or so in the pan, and then turn out. It slices better when it’s cool because it’s a very tender quick bread. Slice into thick slices and serve with softened cream cheese or butter. I got eight thick slices out of my loaf.
  7. If you don’t eat it immediately, slice it and freeze it with parchment between each slice. Then, you can microwave a frozen slice for about 45-60 seconds to defrost and heat.